How to Build a Budget-Friendly Core Ultra PC with the Asus Prime Z890-P Wifi
Overview
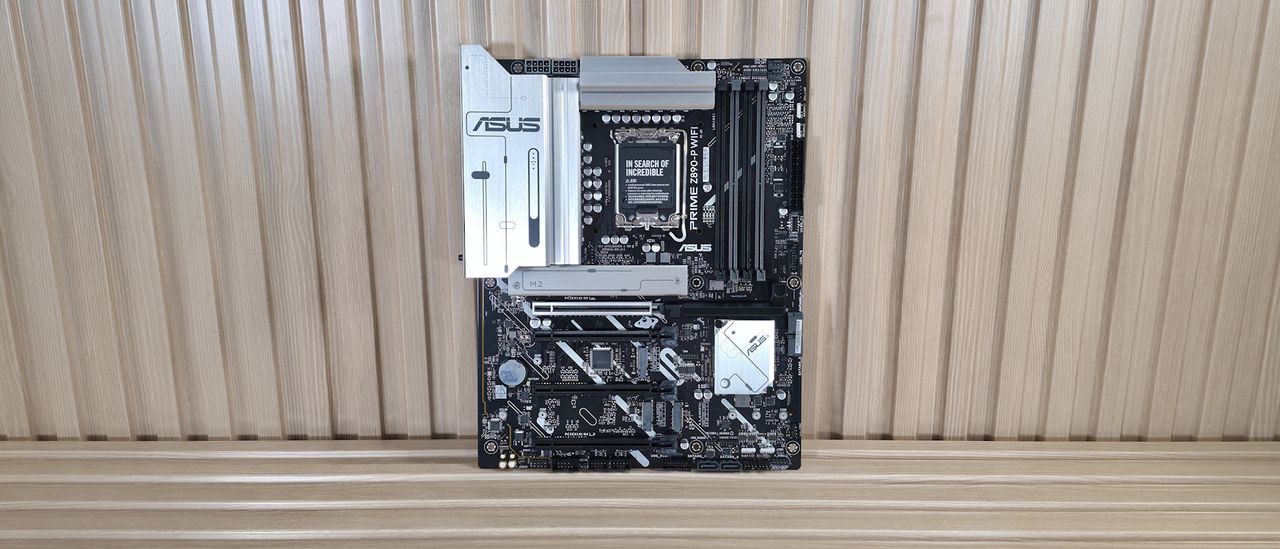
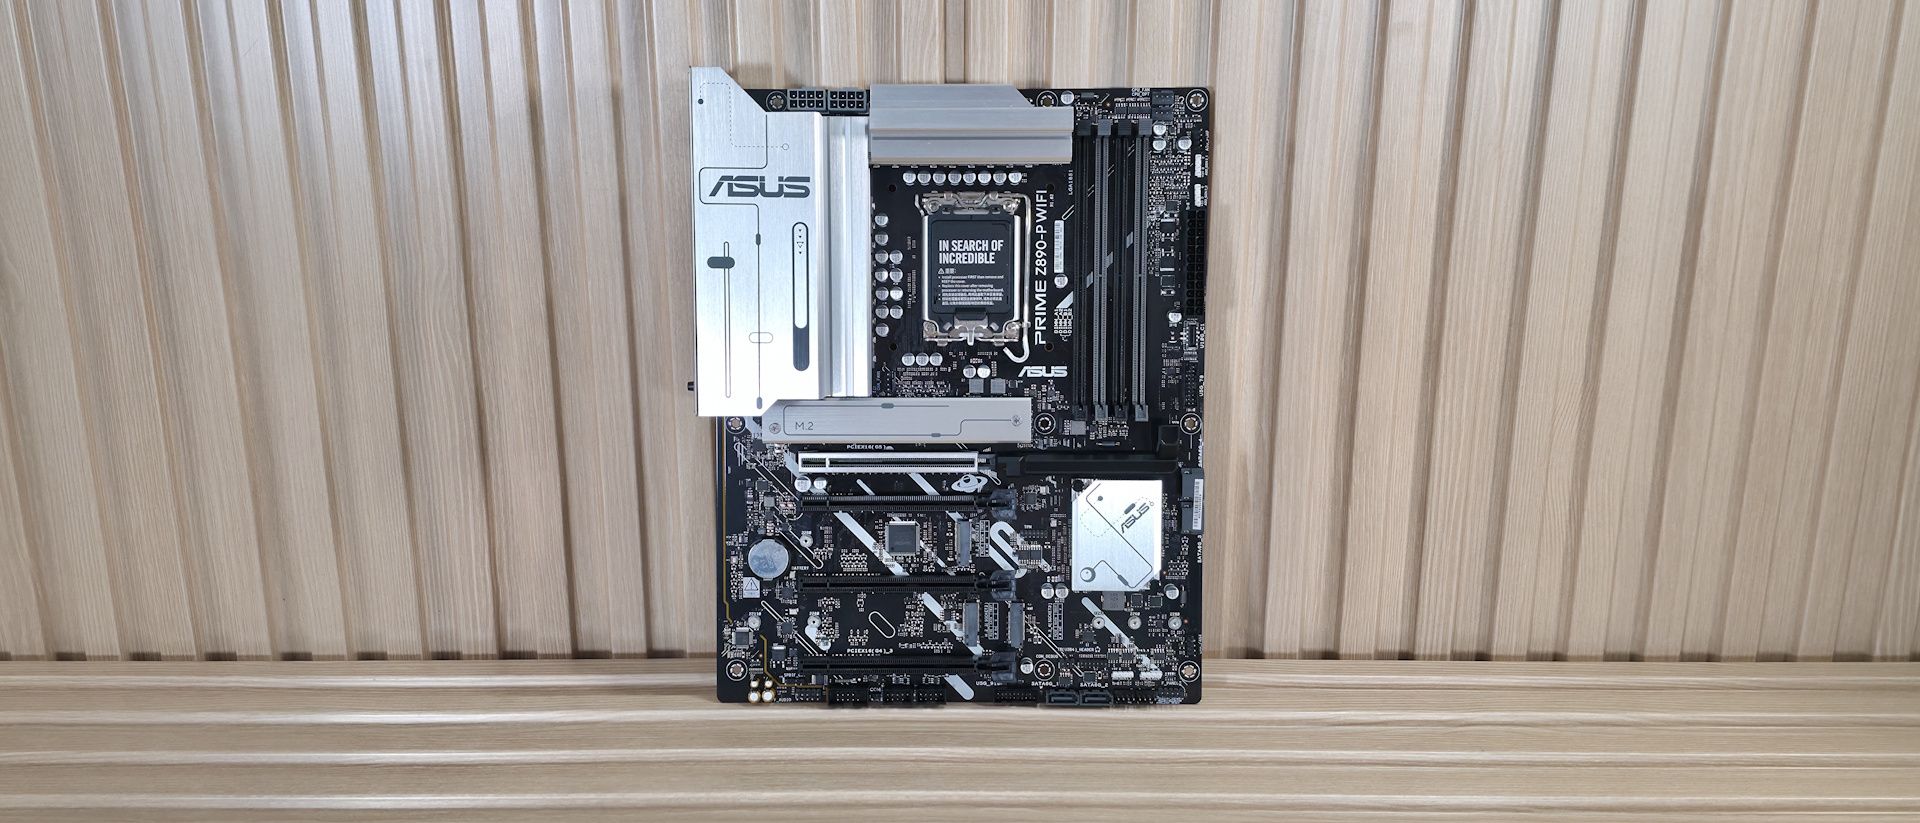
The Asus Prime Z890-P Wifi is a solid, budget-class motherboard designed for Intel's latest Core Ultra processors (Arrow Lake). It offers the core Z890 chipset features—such as PCIe 5.0 support, DDR5 memory, and integrated Wi-Fi 6E—at a more accessible price point. While it doesn't pack the premium extras of higher-end boards, it provides a dependable foundation for a mainstream or entry-level enthusiast build. However, competitors in the same price bracket sometimes offer better value through additional M.2 slots, superior VRM cooling, or more robust audio codecs. This guide will walk you through everything you need to know to successfully build a PC with this motherboard, from initial planning to final setup.
Prerequisites
Hardware Needed
- CPU: Intel Core Ultra 5/7/9 (LGA1851 socket)
- Memory: DDR5 RAM (2x16GB or 2x32GB kits recommended; check QVL)
- Storage: M.2 NVMe SSDs (PCIe 5.0/4.0) or SATA SSDs/HDDs
- GPU: Dedicated graphics card (Core Ultra CPUs lack integrated graphics)
- PSU: 650W-850W 80+ Gold or better (depending on GPU)
- Case: ATX mid-tower with good airflow
- Cooler: LGA1851-compatible air or liquid cooler
Tools and Software
- Phillips-head screwdriver (magnetic tip recommended)
- Anti-static wrist strap or mat (optional but advised)
- USB flash drive (8GB+ for BIOS update, if needed)
- Windows 11 installation media (via Microsoft Media Creation Tool)
- Latest drivers from Asus support page (LAN, audio, chipset)
Knowledge Requirements
You should be comfortable handling PC components, reading motherboard diagrams, and basic BIOS navigation. If you're a first-time builder, consider watching a general build guide first.
Step-by-Step Instructions
Step 1: Prepare the Motherboard and Workspace
Unbox the Asus Prime Z890-P Wifi and place it on a non-conductive surface (the cardboard box works). Inspect the board for bent pins on the LGA1851 socket—do not touch the socket contacts. Locate the key slots: PCIe x16 (top slot is PCIe 5.0), DIMM slots (A2/B2 for dual-channel priority), M.2 slots (PCIe 5.0 slot 1, PCIe 4.0 slot 2 and 3), and the 24-pin/8-pin power headers.
Step 2: Install the CPU and Cooler
Open the socket lever, align the triangle on the CPU with the triangle on the socket, gently drop the CPU in (no force), then close the lever. Apply thermal paste if not pre-applied on cooler. Install the cooler according to its manual (tighten screws diagonally). For the Asus Prime Z890-P, ensure the cooler bracket is compatible with LGA1851; many LGA1700 coolers also fit but verify offset.
Step 3: Install RAM and Storage
RAM: Pop open the DIMM clips, insert modules into slots A2 and B2 (second and fourth from CPU) to enable dual-channel. Press until they click. M.2 SSDs: Remove the heatsink(s), insert the SSD at a 45-degree angle, and secure with the screw. For the top M.2 slot (PCIe 5.0), use the included thermal pad. SATA drives: connect using SATA cables to the yellow ports.
Step 4: Install Motherboard into Case
Place the I/O shield (if pre-installed, skip). Screw in the standoffs (the motherboard box often includes a tool). Align the board with the I/O shield, lower it gently, and secure with screws in the correct holes (usually 9). Do not overtighten.
Step 5: Connect Power, Front Panel, and Fans
- 24-pin ATX (right edge) and 8-pin EPS12V (top left, near CPU) from PSU. The board has an extra 4-pin for extreme overclocking, but the 8-pin is sufficient for most builds.
- Front panel headers: Consult the manual for pinout (power sw, reset sw, HDD LED, power LED). Located bottom-right corner.
- USB 3.2 Gen 2 front-panel Type-C connector (blue male header alongside USB 3.0 header).
- Fan headers: CPU_FAN at top (for cooler), CHA_FAN1/2/3 for case fans. Use PWM fans for best control.
Step 6: Install GPU and Connect Peripherals
Remove PCIe slot covers, insert GPU into top PCIe x16 slot until it clicks, and screw to case. Connect PCIe power cables from PSU. Attach monitor cable, keyboard, mouse, and (if using Wi-Fi) the antennae included with the board.
Step 7: First Boot and BIOS Setup
Power on. If no display, reseat RAM/GPU. Enter BIOS by pressing F2 or Delete. Set XMP/EXPO for RAM (usually Ai Overclock Tuner → XMP I). Enable Resizable BAR for GPU performance. Update BIOS if needed: download latest from Asus, place on FAT32 USB, use EZ Flash under the Tool menu. Disable CSM (if booting UEFI). Set boot order to your Windows installation media.
Step 8: Install OS and Drivers
Boot from USB, install Windows 11 (select custom, create partitions). After installation, install chipset drivers (Intel INF), LAN, audio, Wi-Fi, and graphics drivers from Asus support page or manufacturer websites. Run Windows Update and reboot.
Common Mistakes
Ignoring VRM Cooling
The Asus Prime Z890-P uses a modest VRM heatsink. If pairing with a Core Ultra 9 or overclocking, ensure good case airflow over the VRMs. Consider an aftermarket VRM fan if temps exceed 100°C under load.
Overlooking RAM Compatibility
DDR5 memory can be finicky. Always check the motherboard's QVL list (on Asus website) for tested kits. Using unknown modules may cause instability or failure to boot.
Incorrect M.2 Slot Usage
The top M.2 slot (M.2_1) shares bandwidth with PCIe x16 slot (when using PCIe 5.0 SSD). If you install a GPU and a Gen5 SSD, the graphics slot may drop to x8. Use M.2_2 or M2_3 (PCIe 4.0) for your boot drive to preserve full GPU bandwidth, unless you really need Gen5 speed.
Skipping Standoff Installation
Missing standoffs can short-circuit the board. Double-check that standoffs are installed only in positions matching the board's mounting holes. The case manual and motherboard manual will help.
Forgetting to Update BIOS
Early Z890 boards may require a BIOS update to fully support Core Ultra CPUs or fix memory compatibility. Always flash the latest stable BIOS before Windows installation.
Summary
The Asus Prime Z890-P Wifi is a capable, budget-oriented motherboard that unlocks the Core Ultra platform without breaking the bank. By following this guide—from component selection to BIOS tuning—you can assemble a stable, performant system. Be mindful of its compromises (fewer USB ports, basic audio) and compare with similarly priced alternatives. If you prioritize core functionality and cost savings, this board delivers. But if you need extra M.2 slots or superior VRMs, consider stepping up. Happy building!
Related Articles
- Instagram Rolls Out Disappearing 'Instants' Photos in Direct Challenge to Snapchat and BeReal
- Your Ultimate Guide to the System76 Pangolin Pro: A Lightweight Linux Powerhouse
- How to Build AI Agents Locally with AMD GAIA: A Step-by-Step Guide
- Rewriting Hardware on the Fly: The Revolutionary FPGA Milestone
- AMD Radeon RX 9070 PowerColor Hellhound Plunges to $554 – Record Low for 16GB GPU
- Decoding AMD RDNA 4 Entry-Level GPUs: The RX 9050 Rumor Explained
- Navigating the PC Upgrade Dilemma: A Step-by-Step Guide to Cost-Effective Building in 2026
- GPD BOX: A Compact Powerhouse with Panther Lake and Groundbreaking External PCIe Connectivity